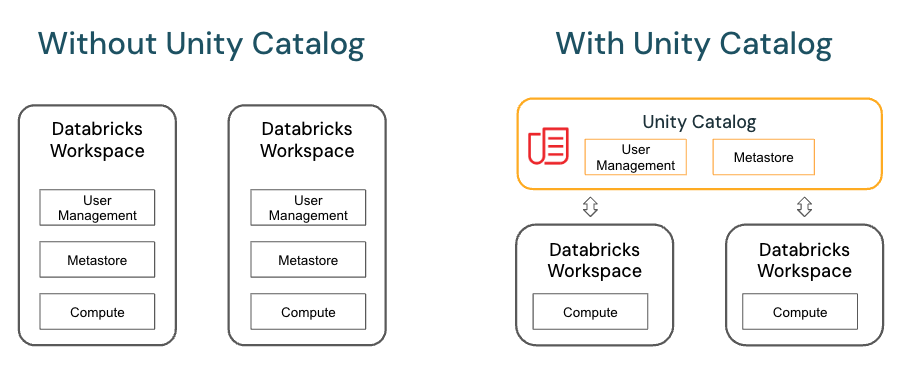
This article explains how to control access to data and other objects in Unity Catalog.
Principals
Entities that can be granted permissions (e.g., users, groups, or roles).
Example: A user like alice@company.com or a group like DataEngineers can be considered principals.
Privileges
The specific rights or actions that a principal can perform on a securable object.
- SELECT: Read data from a table or view.
- INSERT: Add data to a table.
- UPDATE: Modify existing data.
- DELETE: Remove data.
- ALL PRIVILEGES: Grants all possible actions.
Example: GRANT SELECT ON TABLE transactions TO DataScientists;
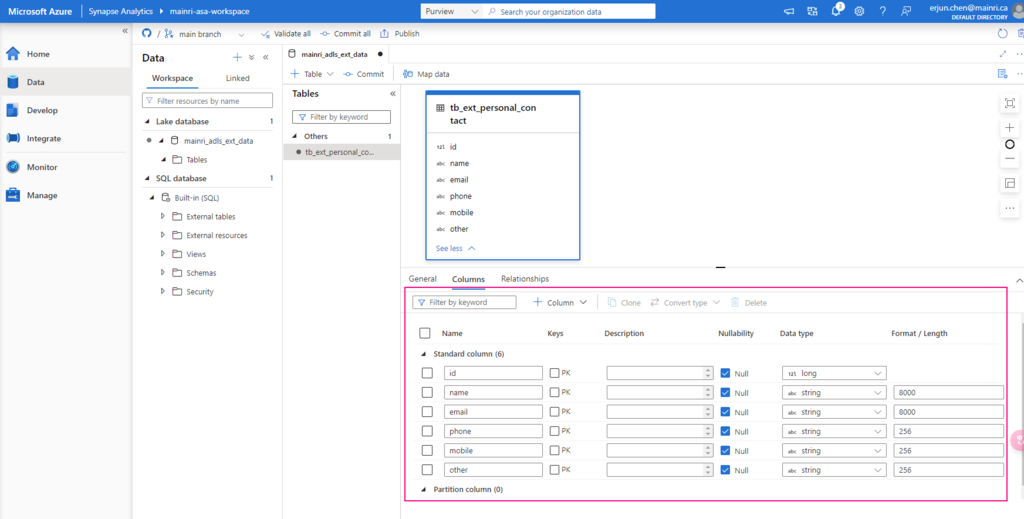
Securable Objects
The resources or entities (e.g., databases, tables, schemas) on which permissions are applied.
- Catalogs (logical collections of databases).
- Schemas (collections of tables or views within a catalog).
- Tables (structured data in rows and columns).
- Views, Functions, External Locations, etc.
Example: In Unity Catalog, the catalog named main, a schema like sales_db, and a table called transactions are all securable objects.
| Concept | Principals | Privileges | Securable Objects |
| Definition | Entities that can be granted permissions (e.g., users, groups, or roles). | The specific rights or actions that a principal can perform on a securable object. | The resources or entities (e.g., databases, tables, schemas) on which permissions are applied. |
| Examples | – Users (e.g., alice, bob) – Groups (e.g., DataEngineers) – Service Principals | – SELECT (read data) – INSERT (write data) – ALL PRIVILEGES (full access) | – Catalog – Schema – Table – External Location |
| Scope | Defines who can access or perform actions on resources. | Defines what actions are allowed for principals on securable objects. | Defines where privileges apply (i.e., what resources are being accessed). |
| Roles in Security Model | Principals represent users, groups, or roles that need permissions to access objects. | Privileges are permissions or grants that specify the actions a principal can perform. | Securable objects are the data resources and define the scope of where privileges are applied. |
| Granularity | Granularity depends on the level of access required for individual users or groups. | Granular permissions such as SELECT, INSERT, UPDATE, DELETE, or even specific column-level access. | Granular levels of objects from the entire catalog down to individual tables or columns. |
| Hierarchy | – Principals can be individual users, but more commonly, groups or roles are used to simplify management. | – Privileges can be granted at various levels (catalog, schema, table) and can be inherited from parent objects. | – Securable objects are structured hierarchically: catalogs contain schemas, which contain tables, etc. |
| Management | – Principals are typically managed by identity providers (e.g., Azure Entra ID, Databricks users, Active Directory). | – Privileges are managed through SQL commands like GRANT or REVOKE in systems like Unity Catalog. | – Securable objects are resources like catalogs, schemas, and tables that need to be protected with permissions. |
| Databricks Example | – User: databricks-user – Group: DataScientists | – GRANT SELECT ON TABLE sales TO DataScientists`; | – Catalog: main – Schema: sales_db – Table: transactions |
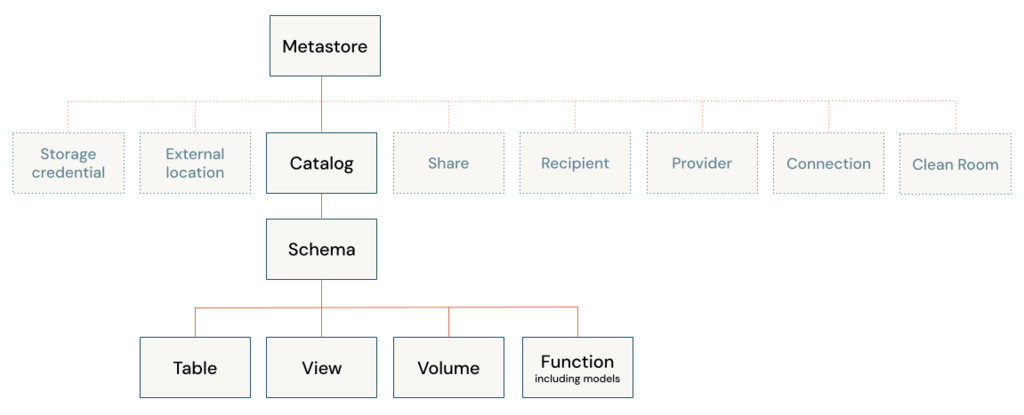
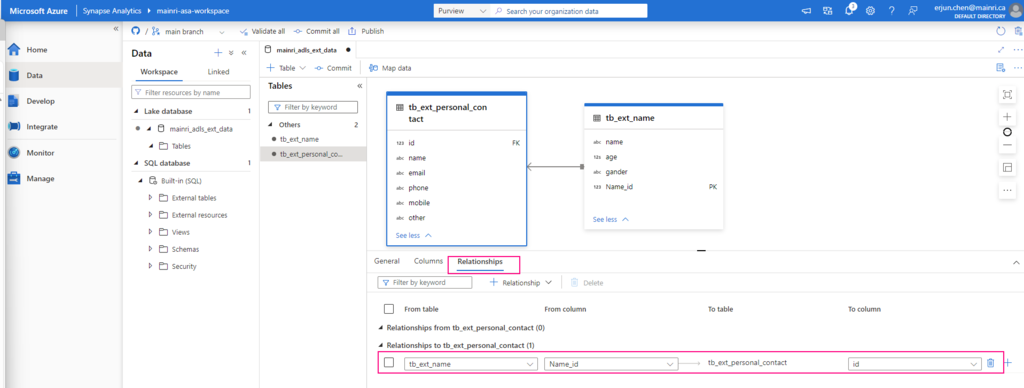
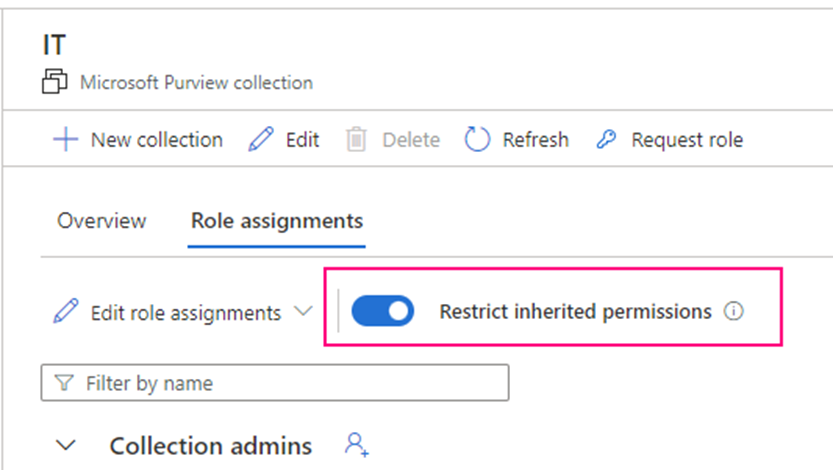
Securable objects in Unity Catalog are hierarchical, and privileges are inherited downward. The highest level object that privileges are inherited from is the catalog. This means that granting a privilege on a catalog or schema automatically grants the privilege to all current and future objects within the catalog or schema.
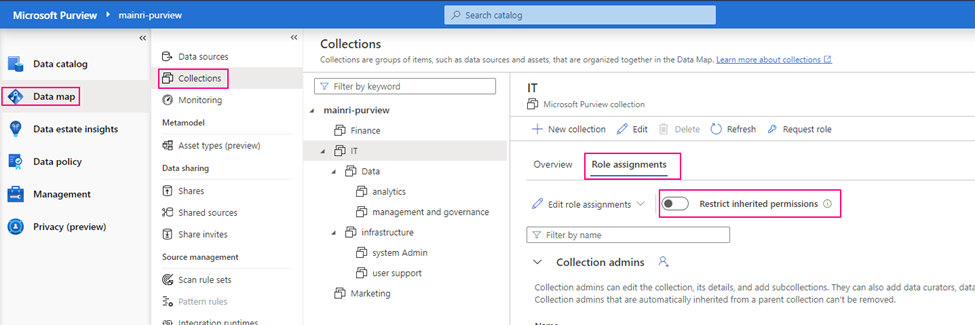
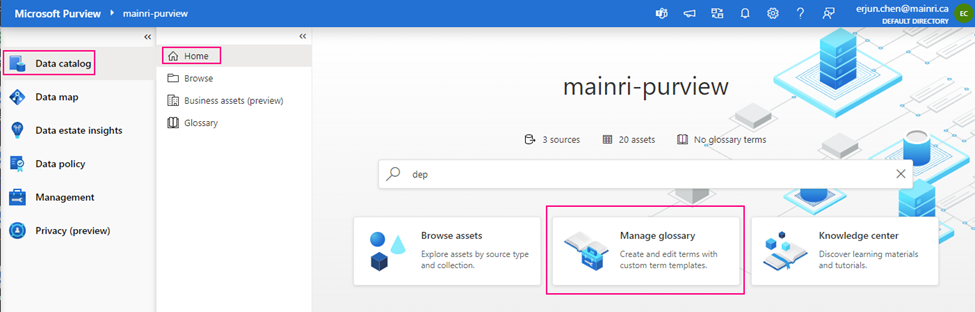
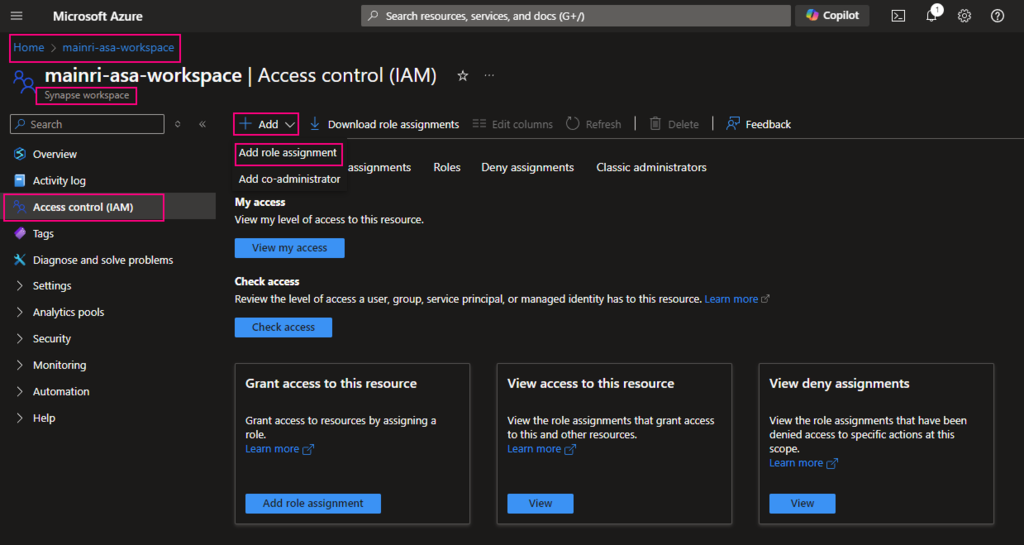
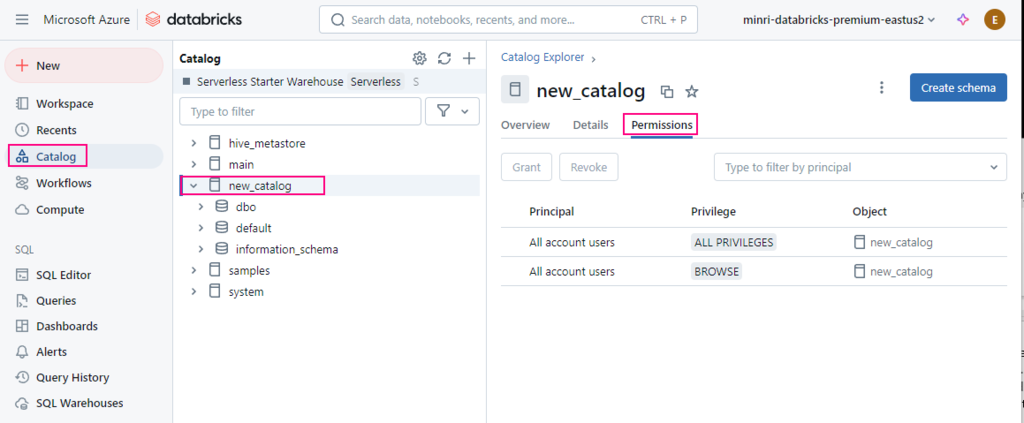
Show grants on objects in a Unity Catalog metastore
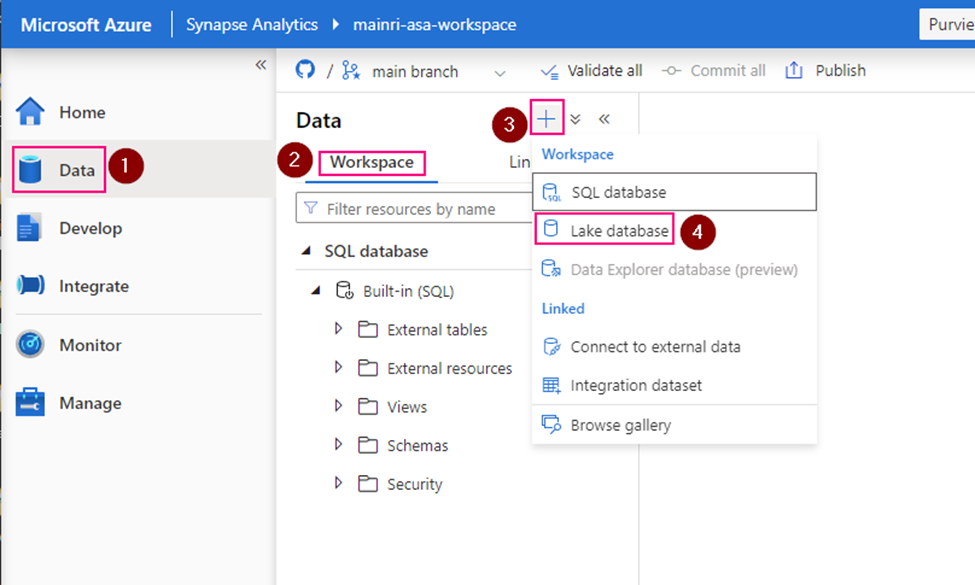
Catalog Explorer
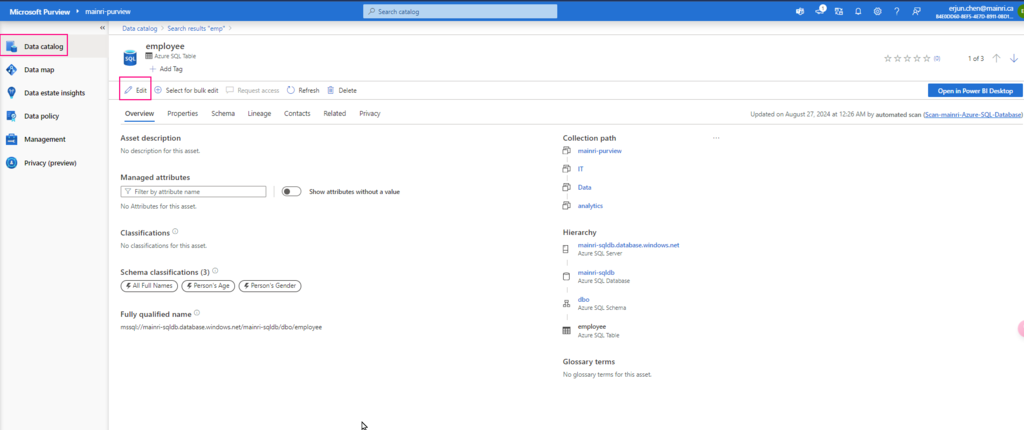
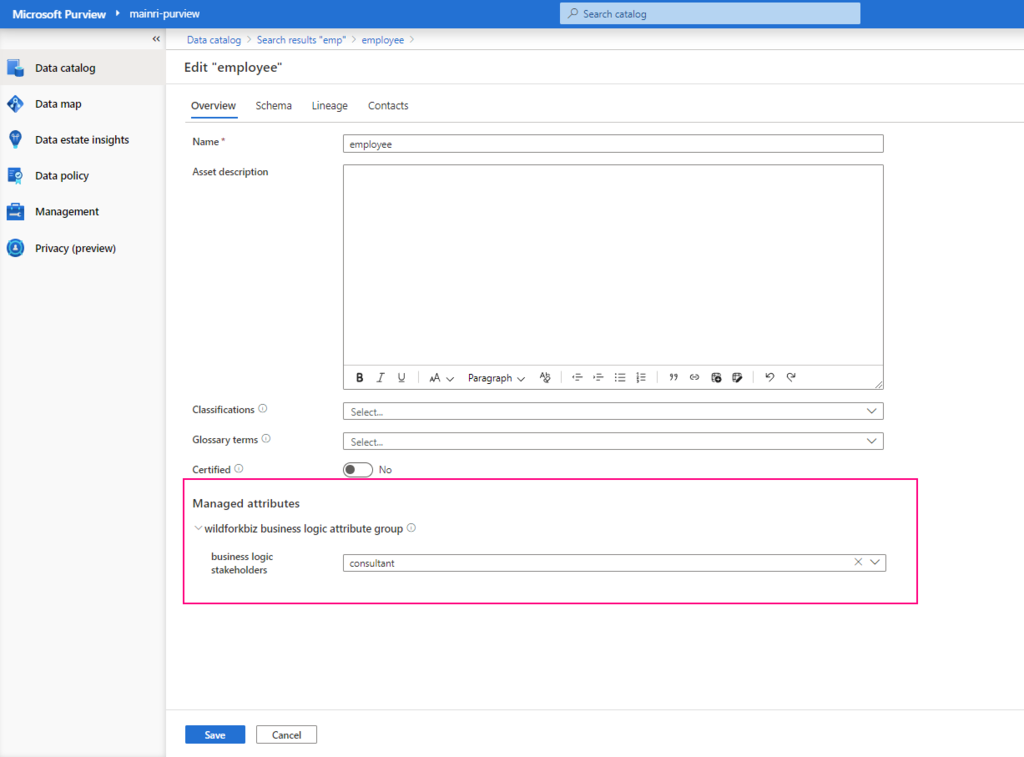
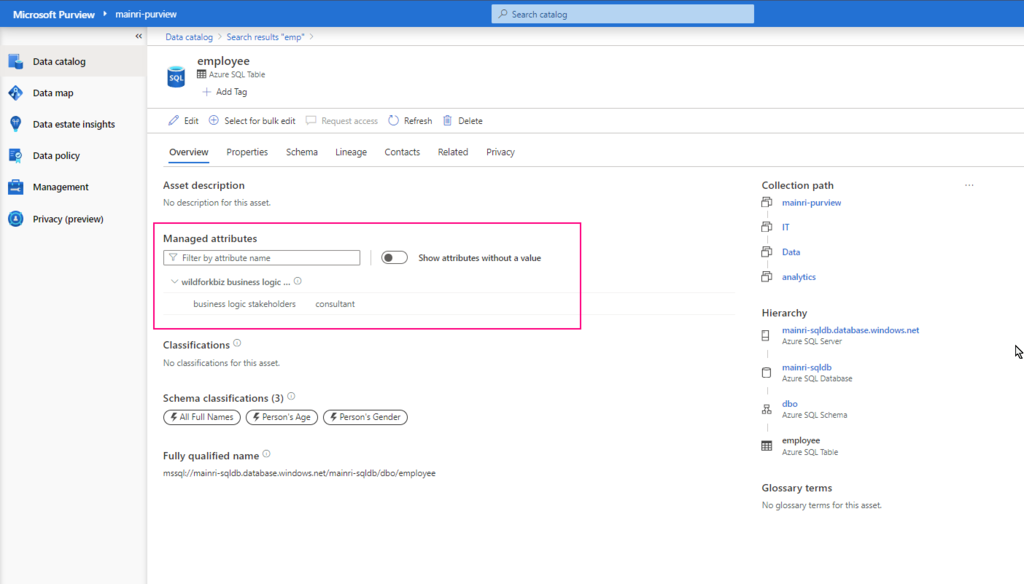
- In your Azure Databricks workspace, click Catalog.
- Select the object, such as a catalog, schema, table, or view.
- Go to the Permissions tab.
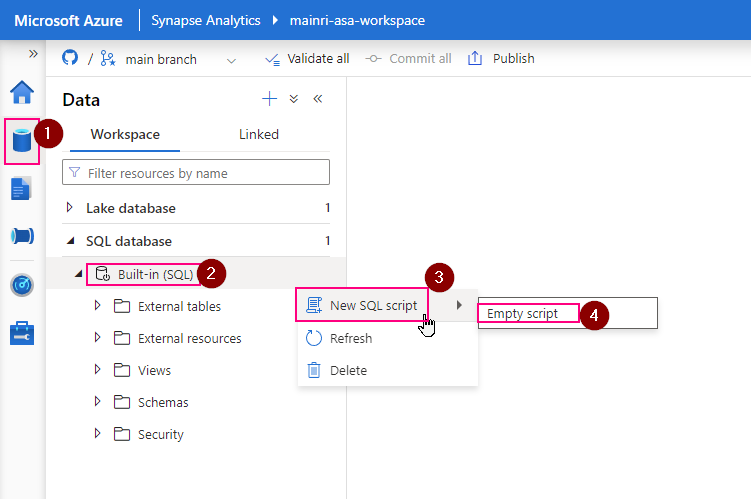
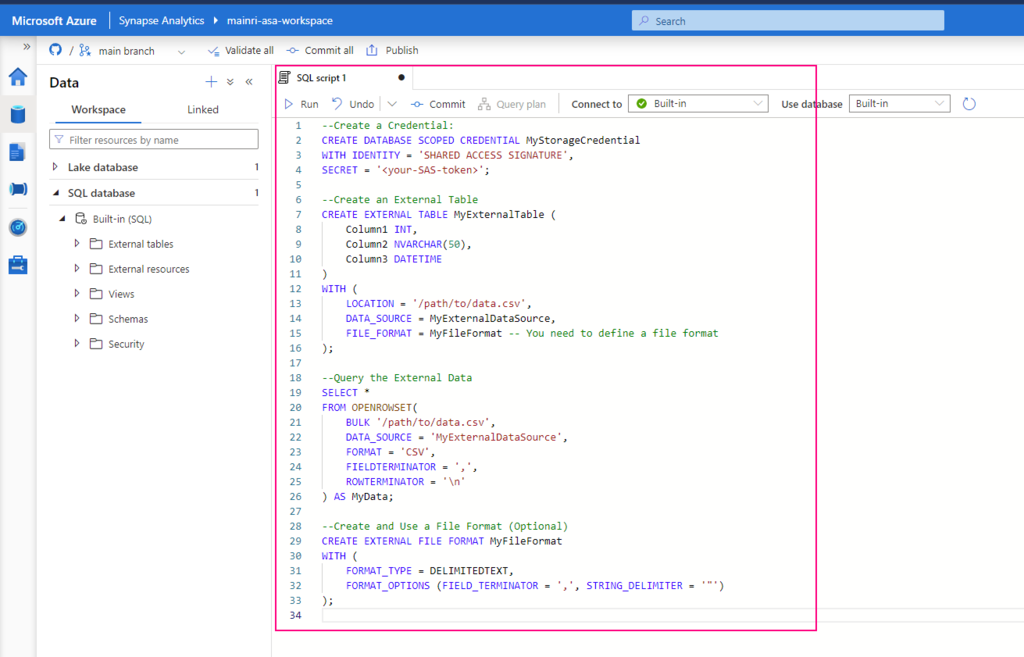
SQL
Run the following SQL command in a notebook or SQL query editor. You can show grants on a specific principal, or you can show all grants on a securable object.
SHOW GRANTS [principal] ON <securable-type> <securable-name>For example, the following command shows all grants on a schema named default in the parent catalog named main:
SHOW GRANTS ON SCHEMA main.default;Please do not hesitate to contact me if you have any questions at William . chen @ mainri.ca
(remove all space from the email account 😊)
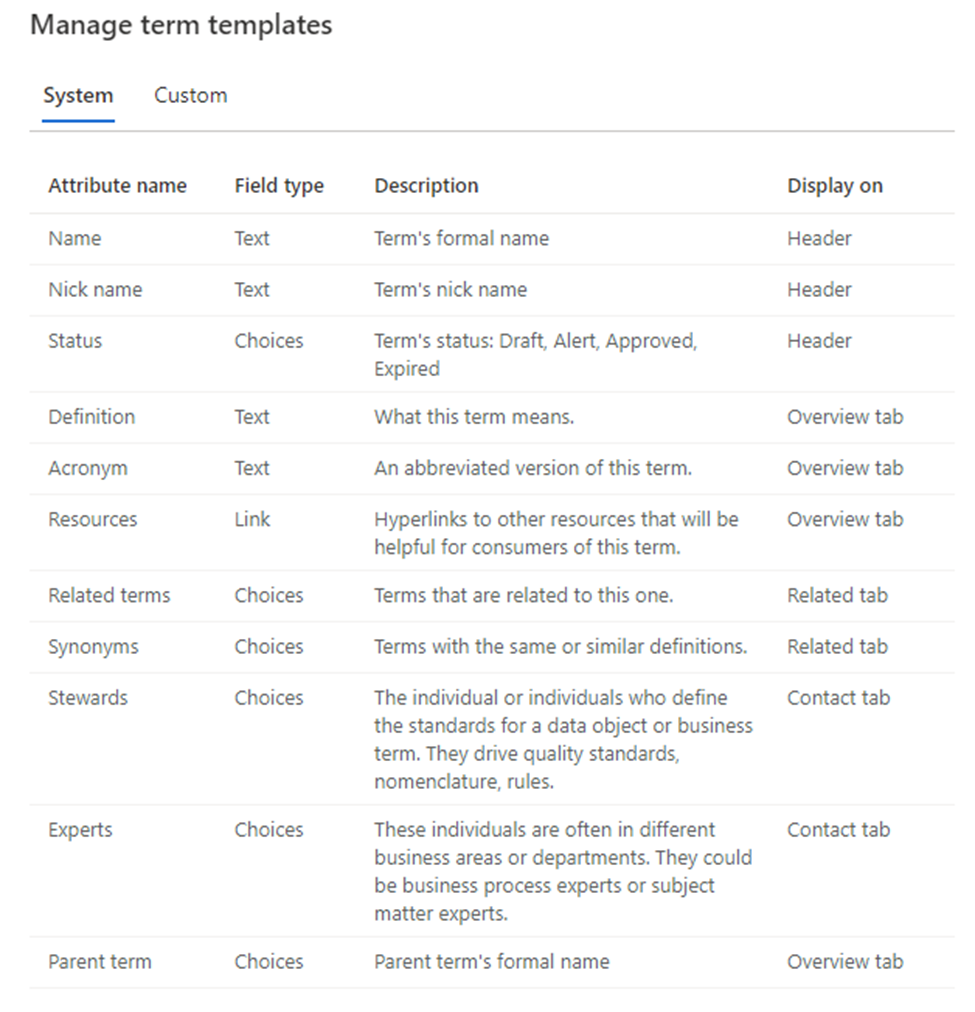
Appendix: