
Before we scan data sources in Azure Purview, we have to register data
resources that to be scanned.
First, we will learn the concept of managed identity and how Azure purview uses it.
Second, we will learn the steps involved in registering ADLS Gen2.
Azure Purview Managed Identity
We will use Azure Purview Managed Identity that is an Azure resource feature found in Azure Active Directory (Azure AD). The managed identities for Azure resources feature is free and there’s no additional cost.
We can use the identity to authenticate to any service that supports Azure AD authentication, including Key Vault, without any credentials in your code. We will use Azure Purview Managed Identity.
Let’s register source data first.
We have to follow these steps to register and scan ADLS Gen 2 account:
- Grant the Azure Purview Managed Identity access to ADLS Gen2 so purview can have access to it. Preview managed identity should have storage blob reader permission on ADLS Gen2
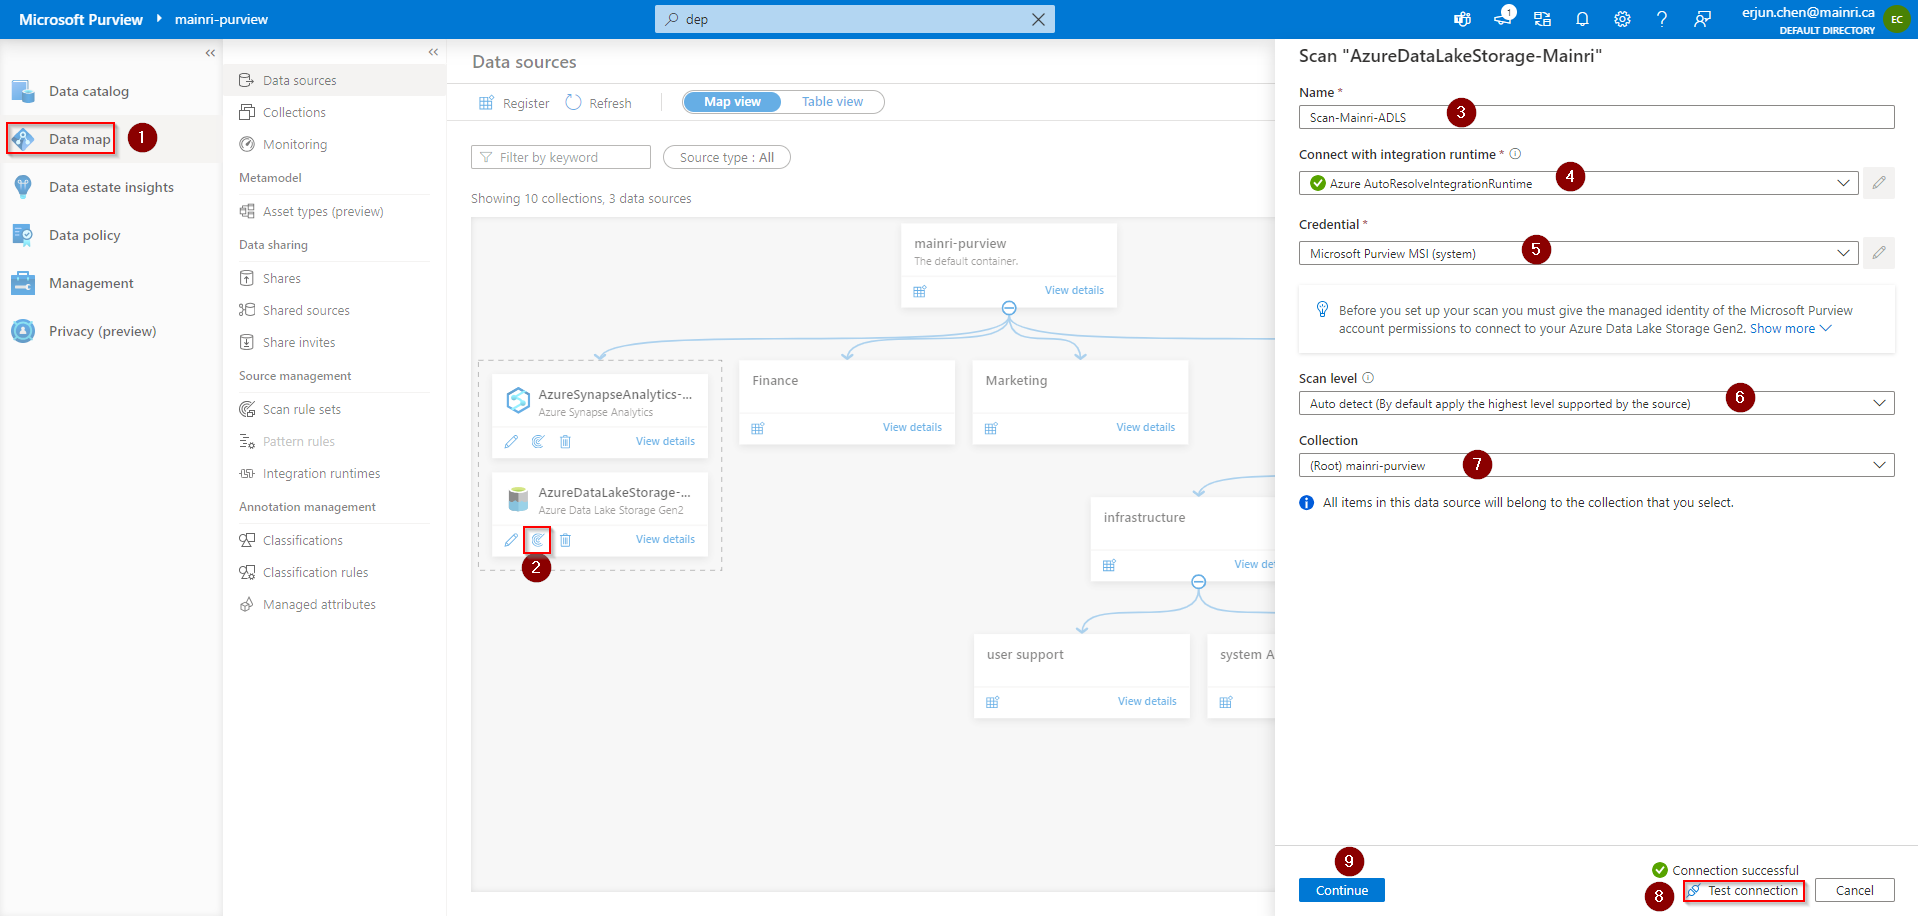
- Scan ADLS Gen2 with the Purview Managed Identity registered in step 1
Register an Azure Data Lake Storage Gen2 account
Azure Portal > ADLS > Access Control > Add role assignment

> storage BLOB Data
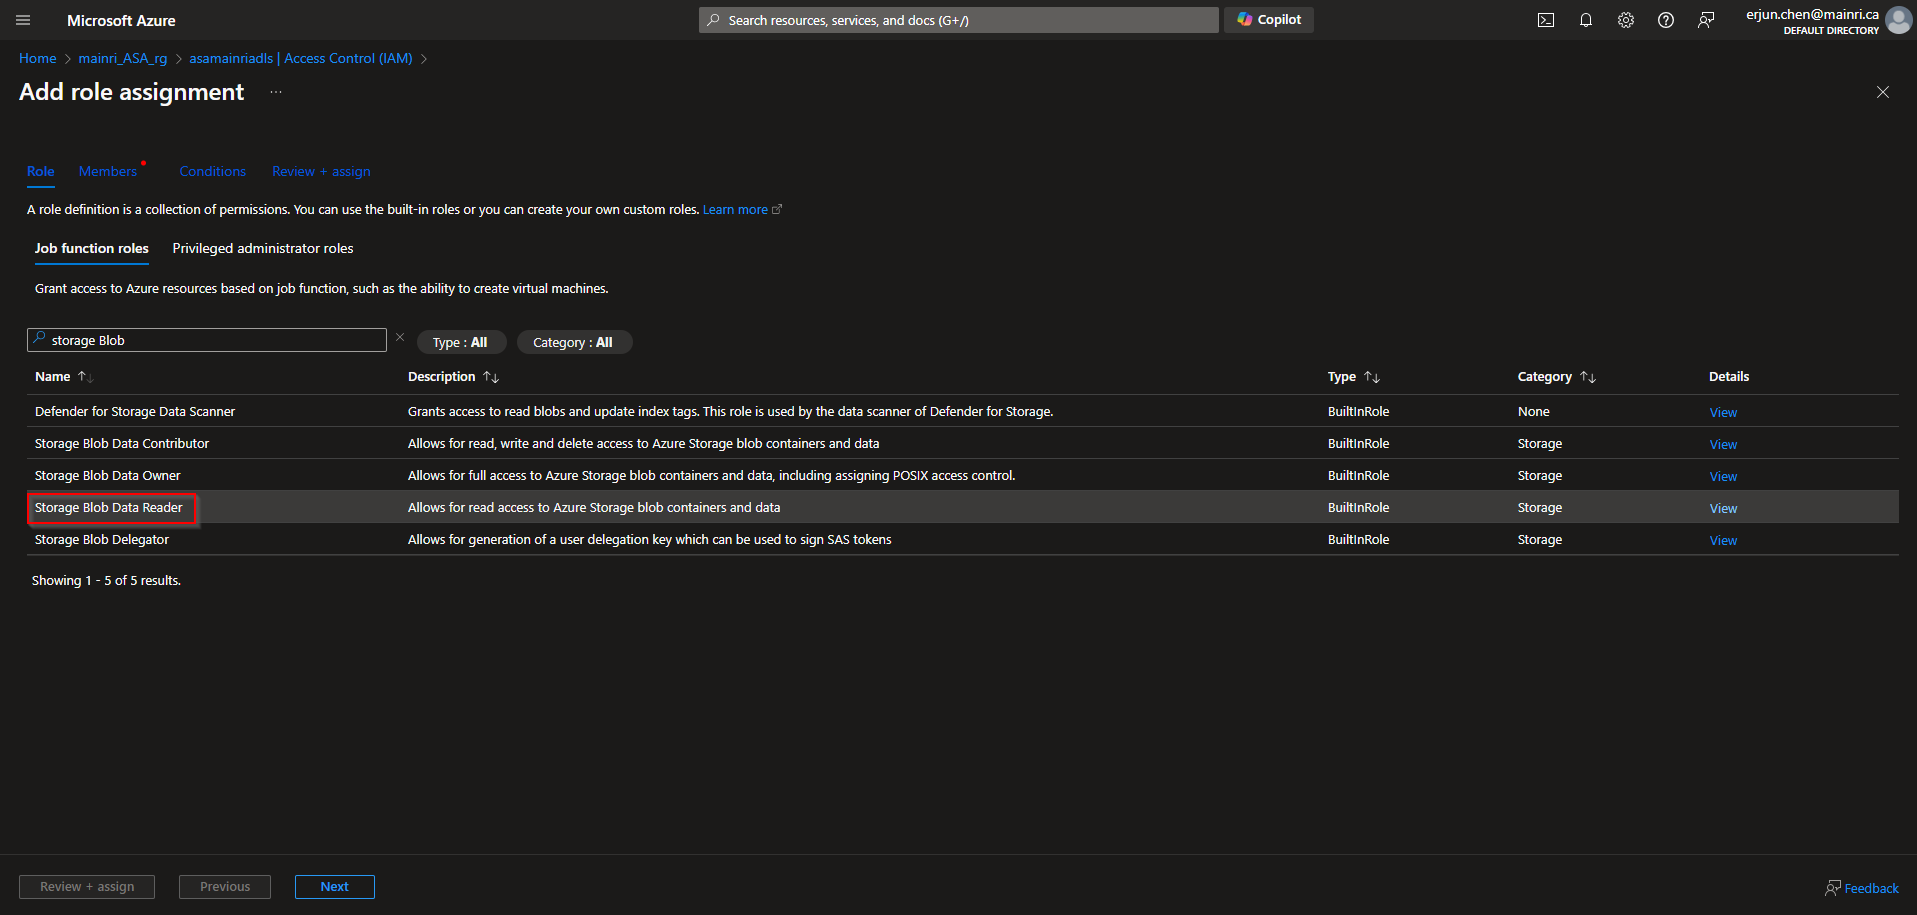
>Select managed Identities

>next > next > review + assign
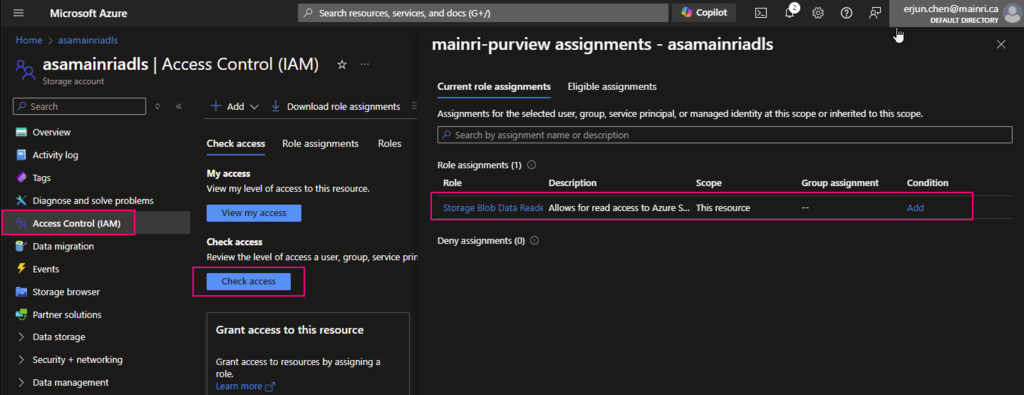
Now, you can “check access”, Now, you can “check access”. It’s added/
Scan data resource
We have talked about creating collection previously, if you need please review “How Microsoft Purview works – Data Source, Rule Sets, and Classification“
now, it’s time for scanning. from Azure Purview Studio
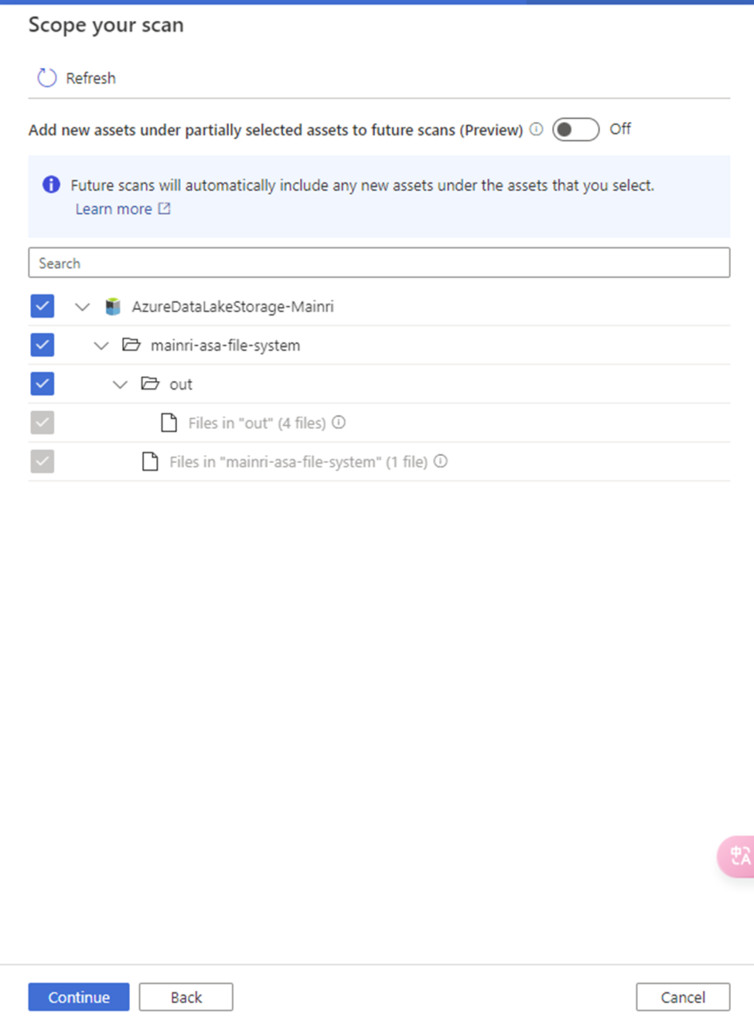
Scope your scan
You will see “scope your scan”. Now we can see all my data and directory structure on ADLS appear.
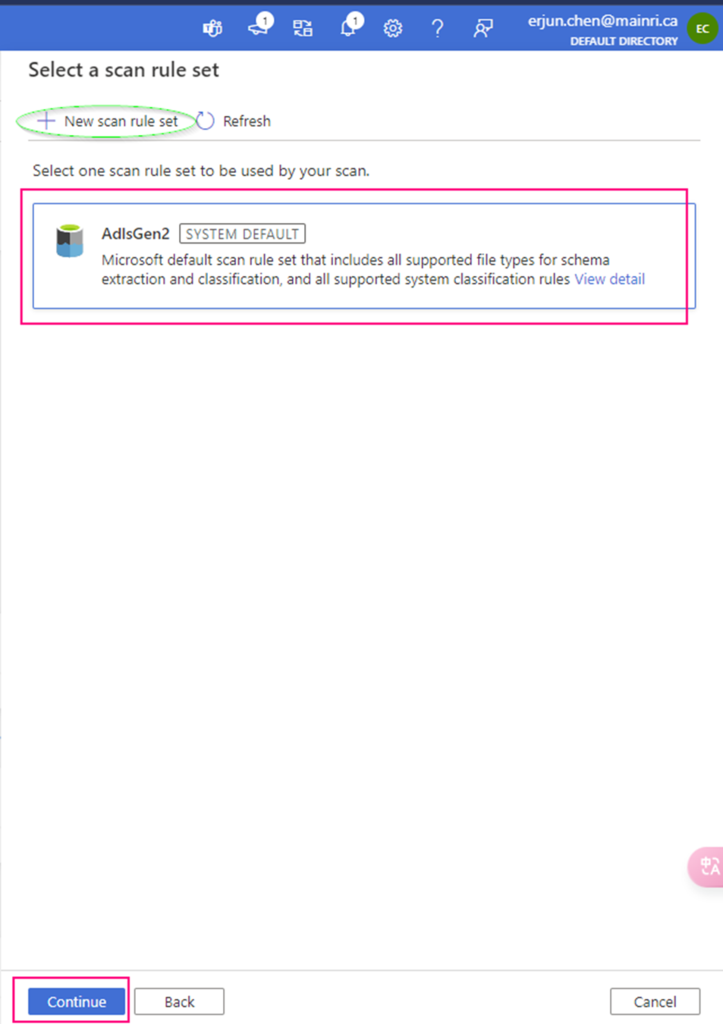
Select scan rule set
We have talked the rile sets in last article. You are able to add even more new scan rule set at this step if you like, or use default Azure System default scan rule set.
Set a scan trigger
Click the continue, you can setup trigger to scan, either once or recurring.

We complete the scan configuration. We have chance to review the configuration if ok save and run the scan progress or back to change it.

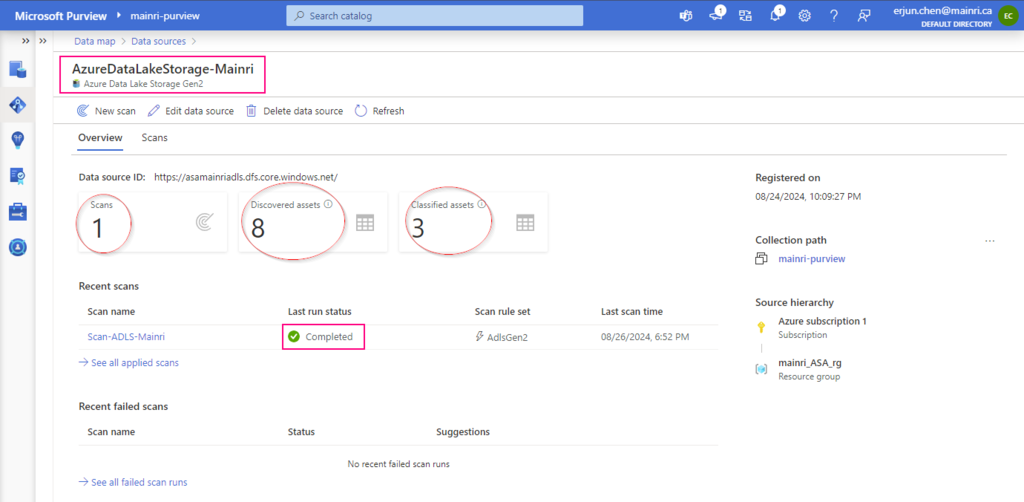
You can see this by clicking “view detail”

You will see this once the scan progress completed.
Next step: Registering Azure SQL Database and Scan in Purview
Please do not hesitate to contact me if you have any questions at William . chen @ mainri.ca
(remove all space from the email account 😊)

