A metastore is the top-level container for data in Unity Catalog. Unity Catalog metastore register metadata about securable objects (such as tables, volumes, external locations, and shares) and the permissions that govern access to them.
Each metastore exposes a three-level namespace (catalog.schema.table) by which data can be organized. You must have one metastore for each region in which your organization operates.
Microsoft said that Databricks began to enable new workspaces for Unity Catalog automatically on November 9, 2023, with a rollout proceeding gradually across accounts. Otherwise, we must follow the instructions in this article to create a metastore in your workspace region.
Preconditions
Before we begin
1. Microsoft Entra ID Global Administrator
The first Azure Databricks account admin must be a Microsoft Entra ID Global Administrator
The first Azure Databricks account admin must be a Microsoft Entra ID Global Administrator at the time that they first log in to the Azure Databricks account console.
https://accounts.azuredatabricks.net
Upon first login, that user becomes an Azure Databricks account admin and no longer needs the Microsoft Entra ID Global Administrator role to access the Azure.
2. Premium Tire
Databricks workspaces Pricing tire must be Premium Tire.
3. The same region
Databricks region is in the same as ADLS’s region. Each region allows one metastore only.
Manual create metastore and enable unity catalog process
- Create an ADLS G2 (if you did not have)
Create storage account and container to store manage table and volume data at the metastore level, the container will be the root storage for the unity catalog metastore - Create an Access Connector for Azure Databricks
- Grant “Storage Blob Data Contributor” role to access Connector for Azure Databricks on ADLS G2 storage Account
- Enable Unity Catalog by creating Metastore and assigning to workspace
Step by step Demo
1. Check Entra ID role.
To check whether I am a Microsoft Entra ID Global Administrator role.
Azure Portal > Entra ID > Role and administrators
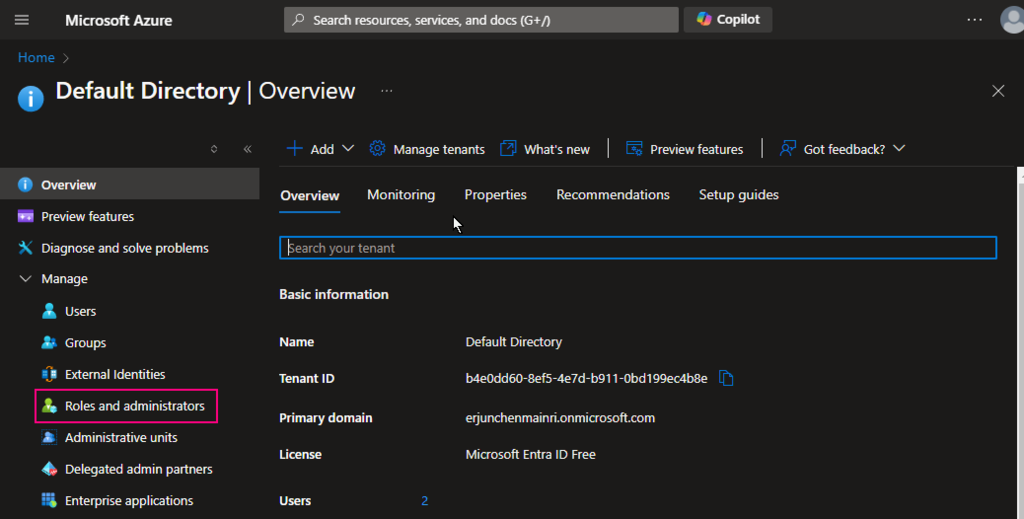
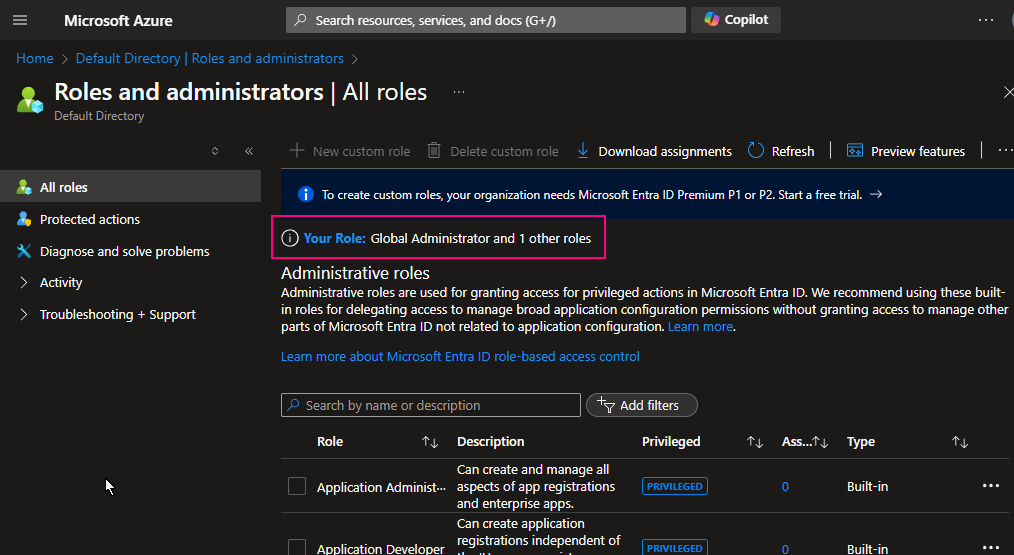
I am a Global Administrator
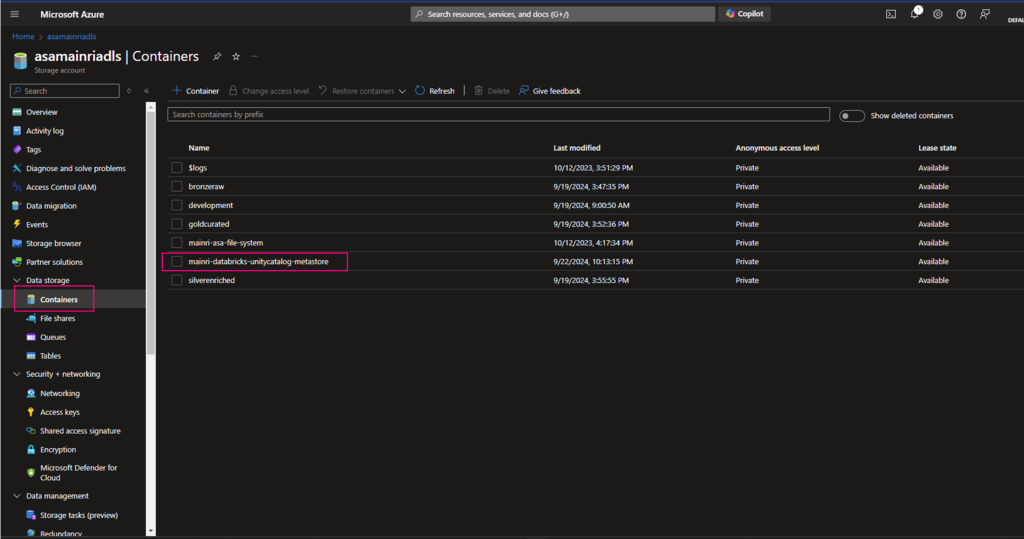
2. Create a container for saving metastore
Create a container at ROOT of ADLS Gen2
Since we have created an ADLS Gen2, directly move to create a container at root of ADLS.
3. Create an Access Connector for Databricks
If it did not automatically create while you create Azure databricks service, manual create one.
Azure portal > Access Connector for Databricks
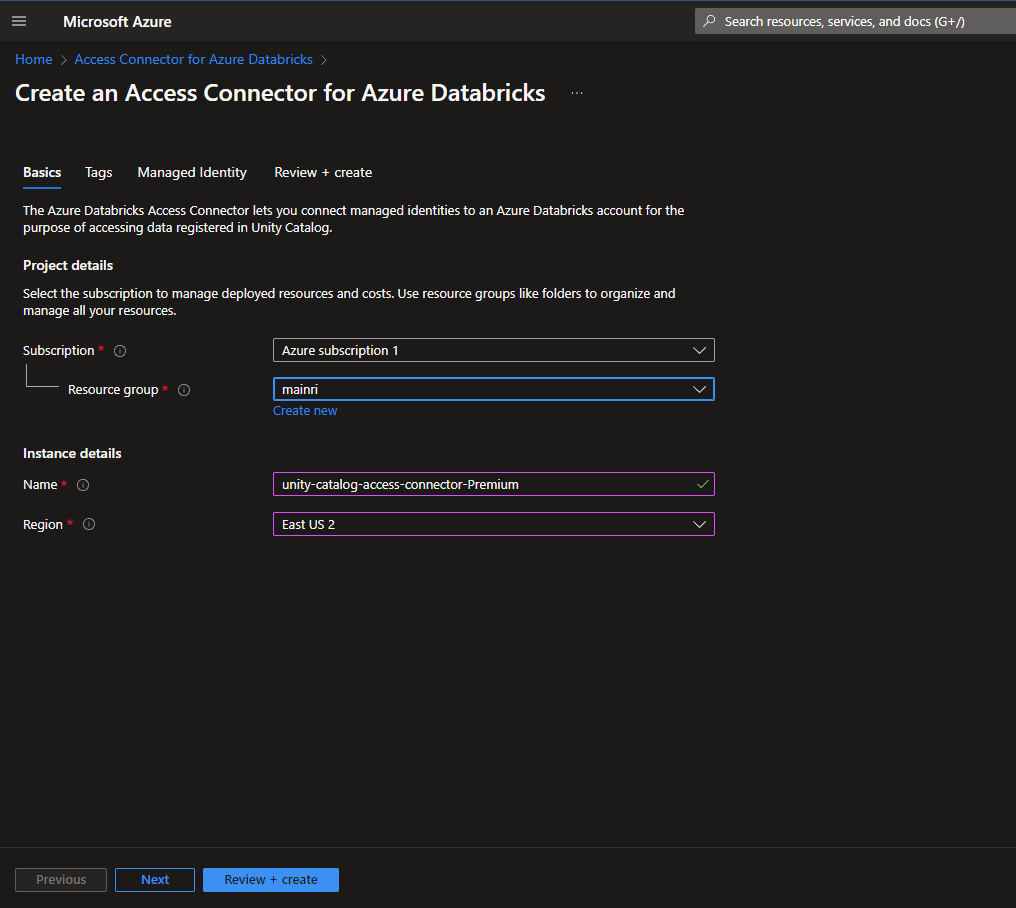
once all required fields filled, we can see a new access connector created.

4. Grant Storage Blob Data Contributor to access Connector
Add “storage Blob data contributor” role assign to “access connector for Azure Databricks” I just created.
Azure Portal > ADLS Storage account > Access Control (IAM) > add role
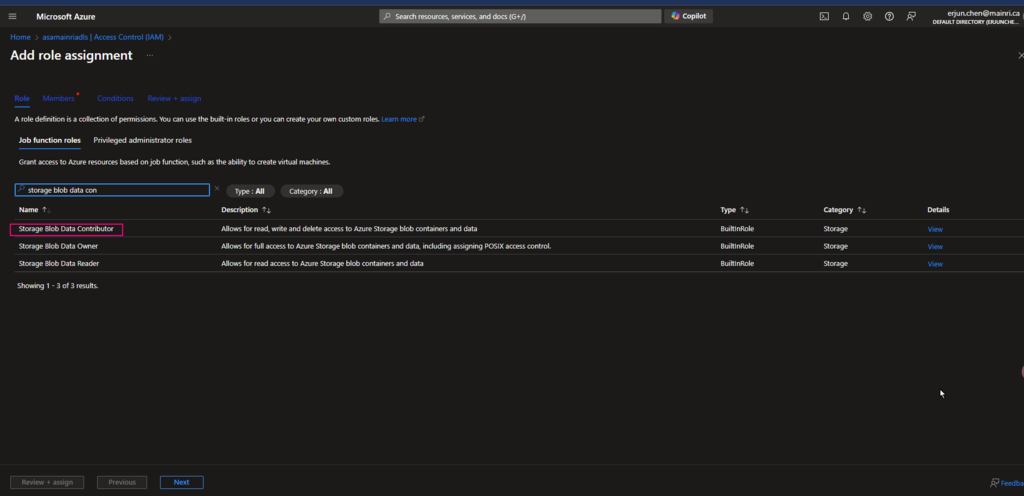
Continue to add role assignment
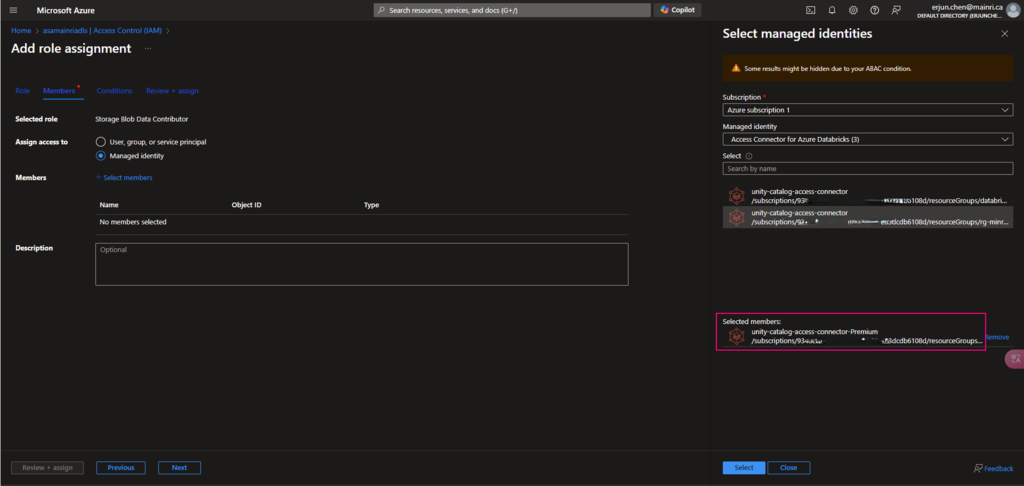
5. Create a metastore
If you are an account admin, you can login accounts console, otherwise, ask your account admin to help.
before you begin to create a metastore, make sure
- You must be an Azure Databricks account admin.
The first Azure Databricks account admin must be a Microsoft Entra ID Global Administrator at the time that they first log in to the Azure Databricks account console. Upon first login, that user becomes an Azure Databricks account admin and no longer needs the Microsoft Entra ID Global Administrator role to access the Azure Databricks account. The first account admin can assign users in the Microsoft Entra ID tenant as additional account admins (who can themselves assign more account admins). Additional account admins do not require specific roles in Microsoft Entra ID. - The workspaces that you attach to the metastore must be on the Azure Databricks Premium plan.
- If you want to set up metastore-level root storage, you must have permission to create the following in your Azure tenant
Login to azure databricks console
azure databricks console: https://accounts.azuredatabricks.net/
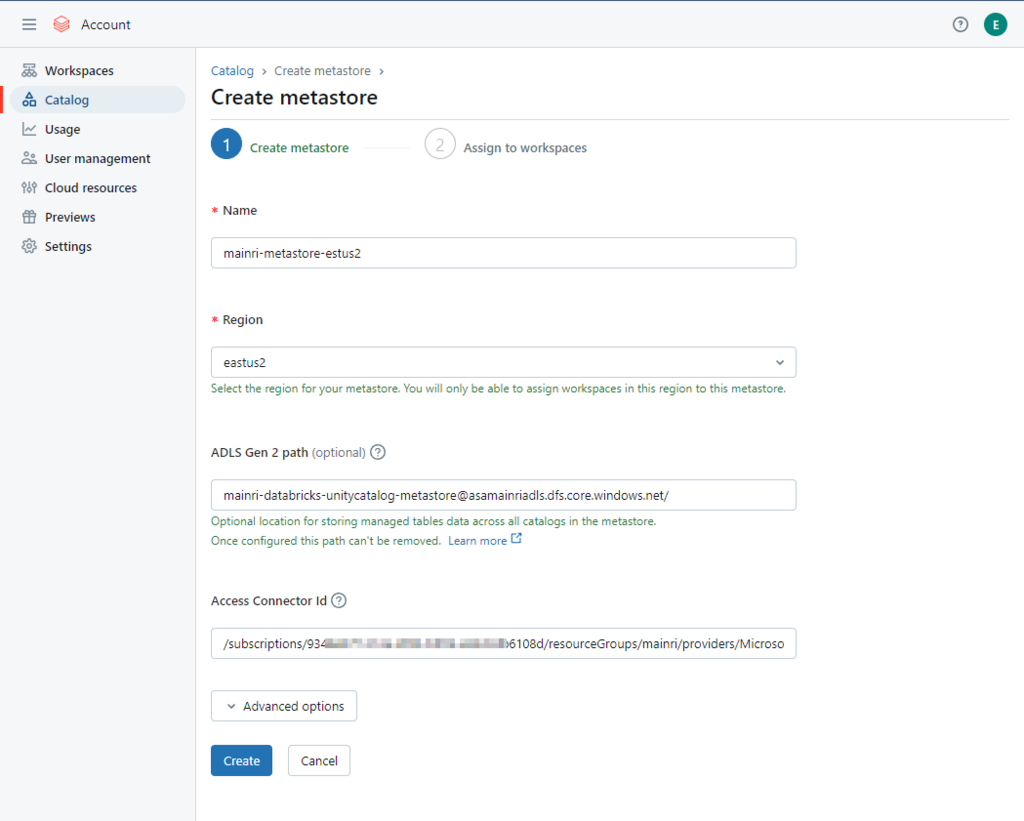
Azure Databricks account console > Catalog > Create metastore.
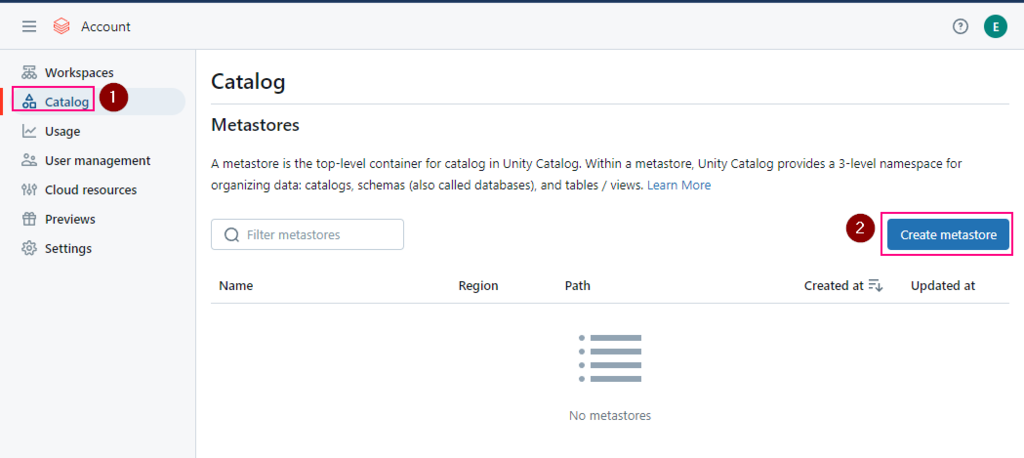
- Select the same region for your metastore.
You will only be able to assign workspaces in this region to this metastore. - Container name and path
The pattern is:
<contain_name>@<storage_account_name>.dfs.core.windows.net/<path>
For this demo I used this
mainri-databricks-unitycatalog-metastore-eastus2@asamainriadls.dfs.core.windows.net/ - Access connector ID
The pattern is:
/subscriptions/{sub-id}/resourceGroups/{rg-name}/providers/Microsoft.databricks/accessconnects/<connector-name>
Find out the Access connector ID
Azure portal > Access Connector for Azure Databricks
For this demo I used this
/subscriptions/9348XXXXXXXXXXX6108d/resourceGroups/mainri/providers/Microsoft.Databricks/accessConnectors/unity-catalog-access-connector-Premiu
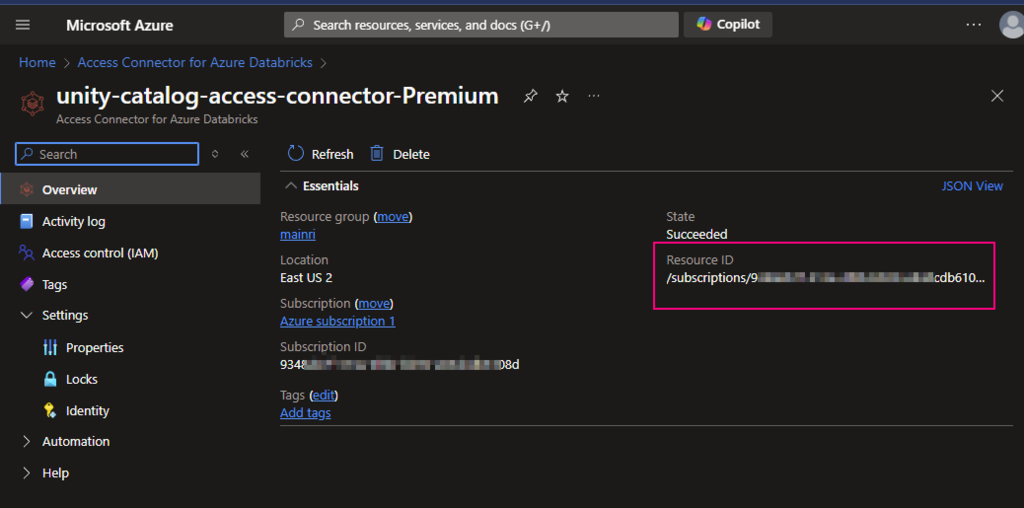
Looks like this
Enable Unity catalog
Assign to workspace
To enable an Azure Databricks workspace for Unity Catalog, you assign the workspace to a Unity Catalog metastore using the account console:
- As an account admin, log in to the account console.
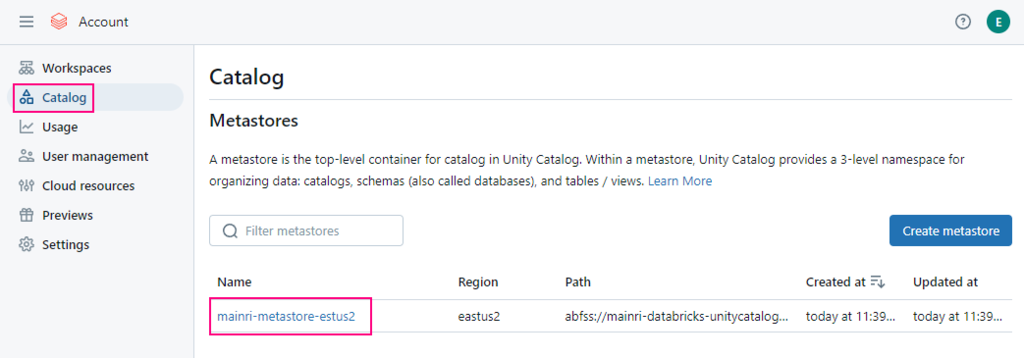
- Click Catalog.
- Click the metastore name.
- Click the Workspaces tab.
- Click Assign to workspace.
- Select one or more workspaces. You can type part of the workspace name to filter the list.
- Scroll to the bottom of the dialog, and click Assign.
- On the confirmation dialog, click Enable.
Account console > Catalog > select the metastore >
Workspace tag > Assign to workspace
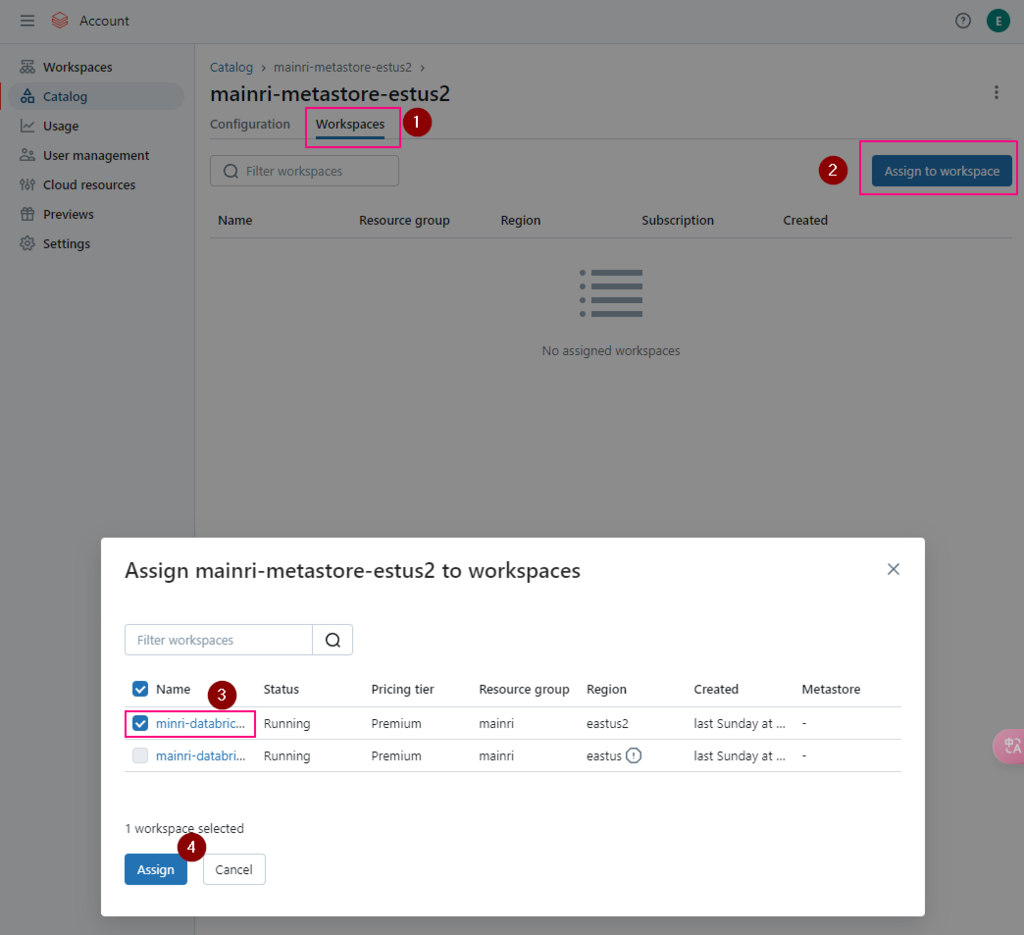
click assign

Validation the unity catalog enabled
Open workspace, we can see the metastore has been assigned to workspace.
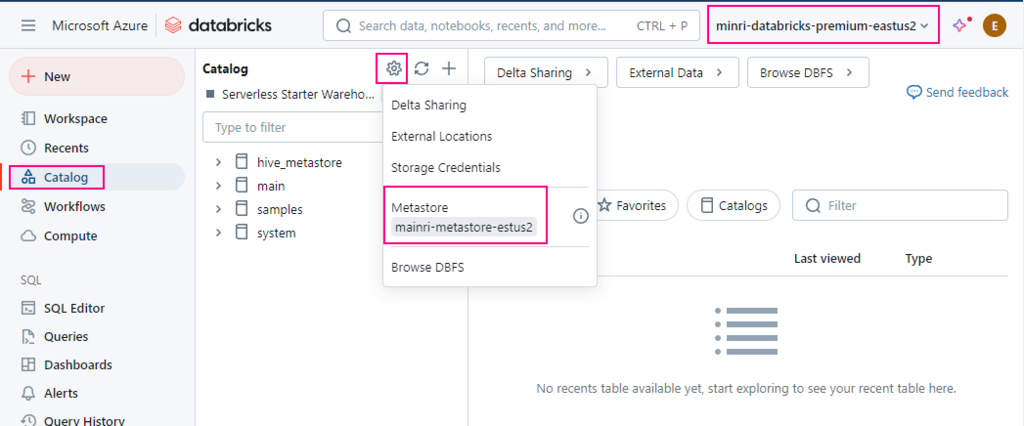
Now, we have successfully created metastore and enabled unity catalog.
Please do not hesitate to contact me if you have any questions at William . chen @ mainri.ca
(remove all space from the email account 😊)

